How to Master Basic Knife Skills for Safer, Faster Meal Prep

This guide covers the fundamental knife skills every home cook needs—proper grip, basic cuts, and safety techniques that transform meal prep from a chore into an efficient, enjoyable process. Whether chopping onions without tears or slicing herbs without bruising them, mastering these techniques saves time and prevents kitchen injuries.
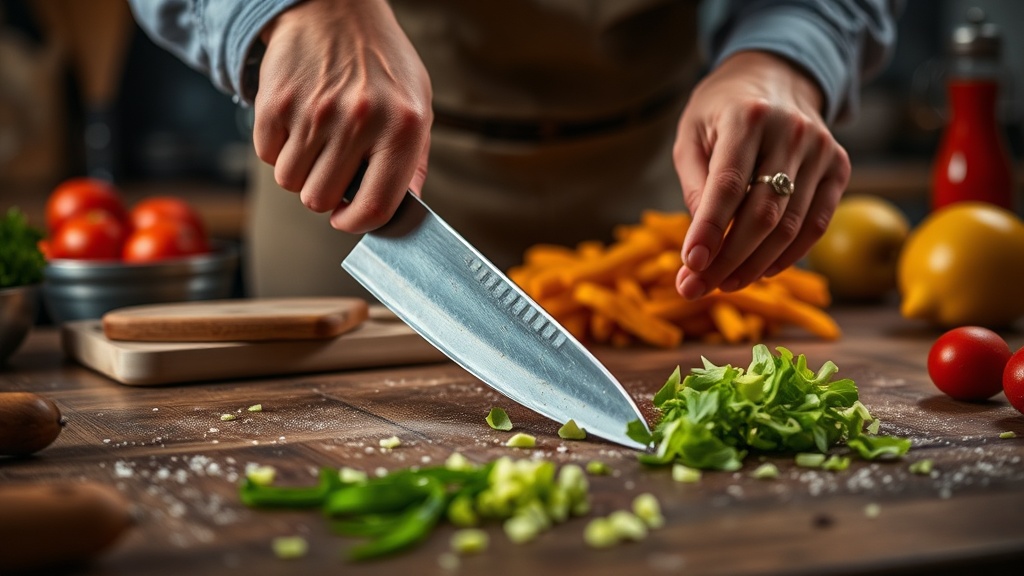
What Is the Proper Way to Hold a Chef's Knife?
The pinch grip is the correct way to hold a chef's knife—pinch the blade where it meets the handle between your thumb and index finger, then wrap your remaining three fingers around the handle. This grip offers maximum control and reduces hand fatigue during extended prep sessions.
Many home cooks grip the handle like a tennis racquet. Don't do this. That grip forces the wrist to work harder and increases the risk of the blade slipping. The pinch grip keeps the hand positioned over the blade's center of gravity.
Here's the thing: your other hand matters just as much. The guiding hand—often called "the claw"—tucks fingertips inward with the thumb tucked behind them. The knuckles guide the blade while fingertips stay safely out of harm's way. Practice this motion slowly. Speed comes naturally once the muscle memory locks in.
Worth noting: knife balance varies by brand. A Wüsthof Classic carries more weight toward the blade, while a Global G-2 feels lighter and more nimble. Try several at a kitchen supply store like Sur La Table before investing.
What Are the Most Important Knife Cuts Every Cook Should Know?
The five foundational cuts every home cook needs are the slice, the dice, the mince, the julienne, and the chiffonade—each serving different purposes in cooking and presentation.
The Slice
Push cuts work best for firm vegetables. Place the knife tip on the board, then push forward and down through the food in one smooth motion. Don't saw back and forth. That crushes cell walls and releases more tears (looking at you, onions).
The Dice
Uniform cubes cook evenly. Start with slices, then stack and cut into strips (batons), then cross-cut into cubes. Small dice measures 1/4 inch, medium dice 1/2 inch, large dice 3/4 inch. Most recipes assume medium dice unless specified otherwise.
The Mince
Garlic, ginger, herbs—anything needing fine distribution without distinct pieces. Rock the blade through the food, pivoting from the tip. Scrape the pile back together. Repeat until the texture resembles coarse sand.
The Julienne
Matchstick cuts, approximately 1/8 inch by 1/8 inch by 2 inches. key for stir-fries and slaws. The key? Rectangular prep. Square off your vegetable first, then slice evenly.
The Chiffonade
For leafy herbs and greens. Stack leaves, roll tightly like a cigar, then slice thinly perpendicular to the roll. Unfurls into delicate ribbons—perfect for basil on caprese or mint on desserts.
| Cut Type | Dimensions | Best For |
|---|---|---|
| Small Dice | 1/4 inch cubes | Mirepoix, salsas, quick-cooking sauces |
| Medium Dice | 1/2 inch cubes | Stews, roasted vegetables, most general cooking |
| Large Dice | 3/4 inch cubes | Long-cooking soups, rustic preparations |
| Julienne | 1/8 x 1/8 x 2 inches | Stir-fries, salads, garnish |
| Chiffonade | Thin ribbons | Herbs, leafy greens, garnishes |
The catch? Consistency trumps speed every time. Uneven pieces cook unevenly—some burnt, some raw. Take the extra thirty seconds to get it right.
How Do You Keep a Knife Sharp and Safe?
A sharp knife is actually safer than a dull one—dull blades require more force, slip more easily, and cause worse injuries when accidents happen. Honing realigns the edge; sharpening removes metal to create a new edge. Both matter.
Honing: Every Time You Cook
Run your blade along a steel honing rod at a 15-20 degree angle before each use. The rod doesn't sharpen—it straightens microscopic teeth along the edge that bend during use. Ten strokes per side, alternating, keeps the edge aligned.
Sharpening: Every Few Months
When honing no longer restores cutting performance, it's time to sharpen. Options include:
- Whetstones — Most control, best results, requires practice. Start with a 1000-grit stone for maintenance.
- Electric sharpeners — Convenient but aggressive. The Chef'sChoice Trizor XV is gentler than most.
- Professional services — Worth the $5-10 per knife if you own expensive blades.
Store knives properly. Never toss them loose in a drawer—that's how edges chip and fingers get cut. Use a magnetic strip, knife block, or blade guards. The Victorinox BladeSafe protectors cost under $10 and fit most chef's knives.
The Cutting Board Matters
Hard surfaces destroy edges. Glass boards? Terrifying. Granite countertops? Edge killers. Stick to wood (maple, walnut) or quality plastic (high-density polyethylene). Cutco offers excellent maintenance guidance, though their direct-sales model isn't for everyone.
That said, even the best board damages edges over time. Expect to sharpen quality knives 2-3 times yearly with regular home cooking.
What Safety Rules Prevent Kitchen Accidents?
Most knife injuries happen during distraction, improper cutting surface setup, or attempting to catch a falling blade. Prevention requires mindfulness and good habits—not fear.
- Secure your board. A wet towel underneath prevents slipping. Nothing destabilizes a cut faster than a board that shifts mid-slice.
- Cut away from the body. Seems obvious. Still happens. The blade travels down and forward—never toward fingers or torso.
- Don't catch falling knives. Step back. Let it drop. Replace a nicked blade; you can't replace a finger.
- Wash knives immediately—or place them safely. Sinks full of soapy water hide blades. Wash right away or place visibly in a designated spot.
- Use the right knife for the job. Paring knives for detailed work, chef's knives for general prep, serrated blades for bread and tomatoes.
Here's the thing about gloves: cut-resistant gloves exist ( brands like NoCry make popular versions), but they're controversial among professionals. Some find them create a false sense of security; others swear by them for beginners. Worth trying if anxiety slows your prep.
What Knife Should Beginners Buy First?
An 8-inch chef's knife handles 90% of kitchen tasks. Start there.
The Victorinox Fibrox Pro runs about $45 and outperforms knives costing five times more. The Fibrox handle stays grippy when wet—important when processing chicken or oily vegetables. The stamped blade (lighter than forged) reduces fatigue during marathon prep sessions.
Ready to upgrade? The MAC MTH-80 ($145) offers Japanese thinness with Western durability. The Wüsthof Classic Ikon ($170) feels substantial and balanced—perfect for those who prefer German heft. Both represent lifetime investments with proper care.
"A $200 knife you maintain beats a $500 knife you neglect. Care matters more than price." — Chef Thomas Keller's philosophy on kitchen tools
Avoid block sets with seventeen knives you'll never touch. Three blades cover everything: chef's knife, paring knife (3-4 inches), and serrated bread knife. Add a boning knife later if breaking down whole animals interests you.
Practice matters more than equipment. Spend twenty minutes weekly doing deliberate cutting—onions, carrots, celery—focusing on technique, not speed. Film yourself. Watch the blade angle. Notice when the knife crushes rather than slices. Adjust.
Good knife skills transform cooking. Prep becomes meditative. Vegetables cook evenly. Presentation improves. Most importantly, confidence in the kitchen grows—opening doors to more ambitious recipes and techniques that once seemed intimidating.
Steps
- 1
Master the Claw Grip and Proper Knife Hold
- 2
Learn the Rocking Motion for Efficient Cutting
- 3
Practice Essential Cuts: Dice, Julienne, and Mince